
Next to the GUI of the Azure Portal, IaC templates or Powershell, one option to interact with the Azure Ressource Manager is the Azure CLI. It is a quite handy way to create or edit resources and you find it in many examples in the internet, especially on the Microsoft documentation pages.
But I had a problem with that long time: saving the created examples proper and a handy way for execution and repeating the tasks. Discovered just a few weeks ago during preparation for a training course, CLI Scrapbooks come for the win…
Writing & Saving CLI code
So the usual task, for example on microsoft learn, is something like:
Insert a statement in the cloud shell, replacing <mysubscription> with your subscription, same for resource group and so on. So, you copy the statement anywhere, replace the values, copy again, paste it in the cloud shell – following the tutorial. For repeating you can save the statements in a file, but what about:
- Syntax highlighting to have it readable?
- Direct execution from the file without pasting the cloud shell?
- Maybe, a big wish from Santa (-; executing a bunch of orders together like a powershell script???
-> .azcli is the answer!
Azure CLI scrapbook files
To get a solution for those points above, we need:
- Visual Studio Code
- Azure CLI
- CLI extension
- Saving the file with .azcli
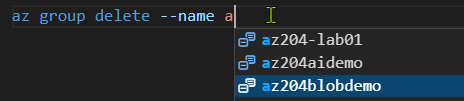
Using these tools and saving what we want to do as Scrapbook (.azcli) files, we get nice syntax highlighting, even with autocomplete. That means that if you start typing your cli command, key words are completed and (logged in into your Azure account) names e.g. for resource groups are checked and suggested for completion. To be honest, that’s sometimes a bit too slow to get value from.
Doing it this way, you can read the file proper and you are well prepared to execute the orders again.
Executing
With Visual Studio Code, there are two way to execute the orders: per line or all together
Single line:
Just put the mouse on the related line, right click (or short cut) and hit <run line in terminal>
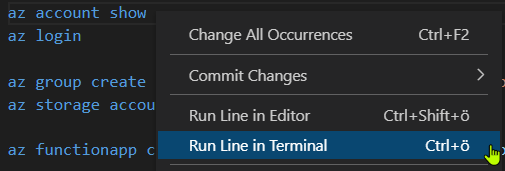
Watch the results in the terminal (or with the other option in a side-by-side editor)
All together:
In this demo case, I have a .azcli file with the orders to:
- Create a resource group
- Create a storage account
- List the storage keys
- Print the connection string
az group create --location northeurope --name az204blobdemo

az storage account create --name stodemo08154711 --location northeurope --resource-group az204blobdemo --sku Standard_LRS

az storage account keys list -g az204blobdemo -n stodemo08154711

az storage account show-connection-string -g az204blobdemo -n stodemo08154711
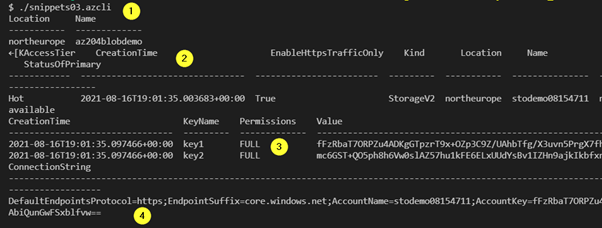
Change the path in the terminal and type (with bash):
./filename.azcli
and watch it executing in this order, all together:
Enjoy CLI coding!