
In this part 2 of the blog series, where we will configure the local setup of Terraform and do a first example deployment with explanations of what happens. In the further course of the series, the dynamization of the code, DevOps pipelines for IaC and possibilities of test automation will be discussed.
Getting Started with an example – Setting Up Terraform
To use Terraform, all you need to do is download the binary package. During manual installation, the PATH variable should also [1]be set so that the runtime environment for the Terraform commands is found. Depending on the operating system, package managers such as Homebrew or Chocolatey are also available for download in addition to the manual option[2].
Visual Studio Code
This could be started directly, the integrated consoles would be sufficient for sending the commands. Of course, a more comfortable development environment is usually used. Once again, Visual Studio Code (VS Code) is very well suited here. The tool is free, lightweight, and open-source. It has a practical Git integration and can be extended with numerous useful extensions, suitable for the respective application. For working with Terraform, it is worth looking at the following extensions:
- HashiCorp Terraform[3]
- Azure Terraform[4]
- Go (for IaC test automation with Terragrunt)
- JSON Tools (Eric Lynd)
This supports the developer with features such as syntax highlighting, IntelliSense (Ctrl + space), navigation in the code, and automatic formatting.
The necessary provider-specific modules do not have to be installed in advance; this happens automatically during the deployment process.
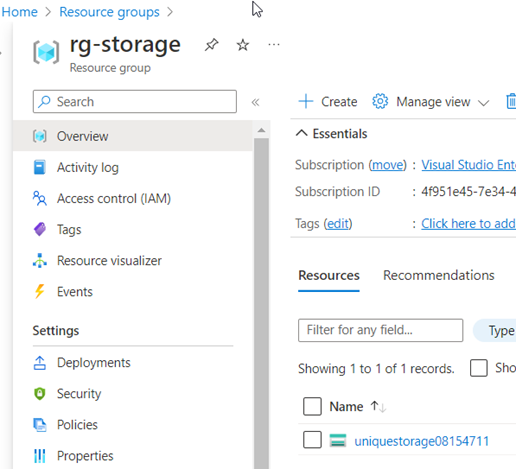
Deploying a Storage Account
The principle and steps of a Terraform deployment will be illustrated with a simple example. A storage account is provisioned for this purpose.
To start, all we need is a single file, named main.tf with the following content:
Provider "azurerm" {
features {}
}
resource "azurerm_resource_group" "sto_rg" {
name = "rg-storage"
location = "West Europe"
}
resource "azurerm_storage_account" "mystorage" {
name = "uniquestorage08154711"
resource_group_name = azurerm_resource_group.sto_rg.name
location = azurerm_resource_group.sto_rg.location
account_tier = "Default"
account_replication_type = "LRS"
tags = {
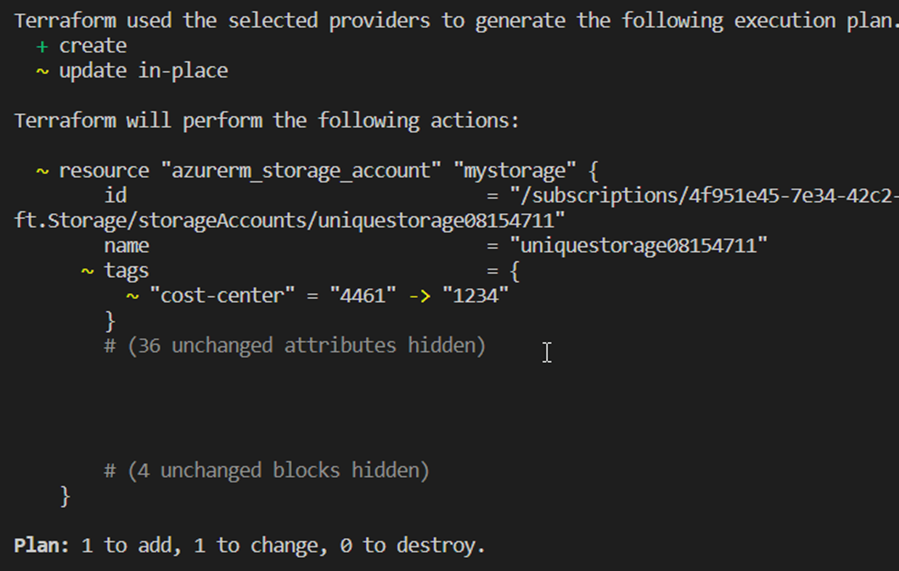
cost-center = "4461"
}
}
This creates a new storage account with minimal configuration in a new resource group. Larger applications usually have a folder structure and various files. The provider section with the features block should not be missing here, even if it only works with default values in this form.
In our example, we have resource blocks with the types for resource group and storage from the provider, as well as the names that can be used to access them in the configuration. For deployments in the Microsoft cloud, the azurerm provider is used.
Terraform uses various file extensions, most of which are:
- .tf (for configuration, i.e. the code from the IaC)
- .tfvars (input files for variables to be read)
- .tfstate (administration of the Terraform State)
- json (e.g. schema information)
The details will be discussed during the series.
References in the configuration
Before we start the first deployment, let’s take a quick look at the referencing: The storage account also needs to specify the region and resource group. These could also be specified as strings. Our reference method in code avoids typos by reading the values from the resource group’s attributes instead. In addition, this method also ensured that dependencies of the resources and the order in the deployment process are set correctly – after all, the resource group must be created before the storage where it is to be placed. If there are complications with the dependencies, the [depends on] attribute can be used to force the order for the resources.
What is Terraform State?
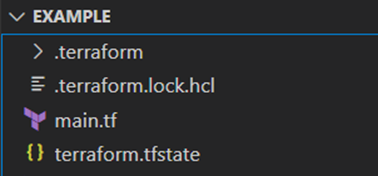
A central component of Terraform is the management of the current state of the resource deployment. By default, this is stored in a local file called terraform.tfstate – called Statefile. This refers to a local backend on the client machine. Often, however, the state file is configured remotely, for example in an Azure Storage Account or an Amazon S3 bucket. The statefile file is written in JSON format and contains a mapping between the written IaC configuration and the remote objects, i.e. the resources at the provider. When a resource is created, its identity and configuration are recorded in the state to retain the unique assignment for later operations. Terraform also collects the provider resource type as well as the internal name. By updating the state before change operations, the necessary target/actual comparison can be carried out and only the changes can be deployed.
The essential importance becomes clear in a simple example: The resource group created in a first step, for example, should be renamed. The configuration is rewritten and with the help of the tracked information in the state, it is possible for Terraform to find the correct group at the provider – delete it at the end – and create the new one, instead of having both in parallel, for example. If, for example, only tag information is changed, an update can be made without deleting and recreating the resource.
Other reasons to use the statefile to manage deployments include capturing dependencies between resources for deletion, such as virtual machines and their VNet/Subnet integrations. These are recognizable in the configuration, but if they are removed from the code, Terraform can use the state to keep the correct order. In addition, in the case of very large deployments, it may make sense to skip the update of the state when creating the plan for performance reasons or provider API restrictions. Instead, cache values are used for the resource attributes in the statefile. The statefile should never be stored in a repository, as sensitive information such as secrets can always be seen there in plain text.[5]
Manual changes in the state are strongly discouraged, if adjustments are necessary, this should be done with the appropriate CLI commands such as terraform import. [6][7] Following figure shows the snippet of a statefile for the resource group:
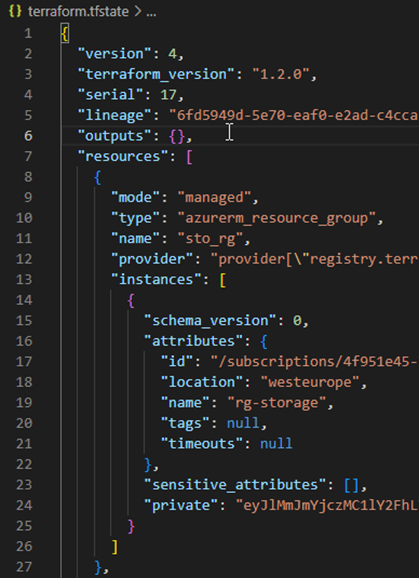
Internal names of the resources in the configuration should not be changed easily. If, as in the example from sto_rg to sto_rg123, there is a mapping error:

However, if this is necessary, the move command for the statefile provides a simple remedy:
terraform state mv azurerm_resource_group.sto_rg azurerm_resource_group.sto_rg123
As of version 1.1, this is also possible with a moved block in the configuration.[8]
Example deployment from source code to cloud resource
Using the example of storage deployment, the main commands of Terraform are explained:
- terraform init
- terraform fmt
- terraform validate
- terraform plan
- terraform apply
- terraform destroy
Init
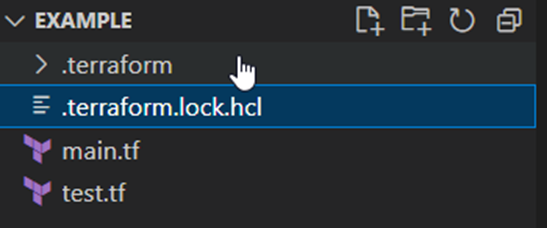
The init command prepares the deployment. The defined backend for the state file is initialized and the necessary rights to it are checked. The configuration is searched and, if not already available, the necessary plugin modules are downloaded from the respective provider of the resources. The information of the pulled providers then ends up in a binary file in the .terraform folder and in a .lock file managed by Terraform.[9]
Format & Validation
Terraform fmt helps with the readability of the code by applying consistent formatting to the configuration files and removing e.g. superfluous spaces or tabs. Validate can be used to “dry” check the syntax of the code. This step determines, for example, whether references in the configuration are correct, whether no duplicate resources are defined as a block and, for example, whether closing quotation marks or parentheses are missing. However, the provider API is not called, so authentication errors or an already assigned name for example are not detected in this way.
Plan
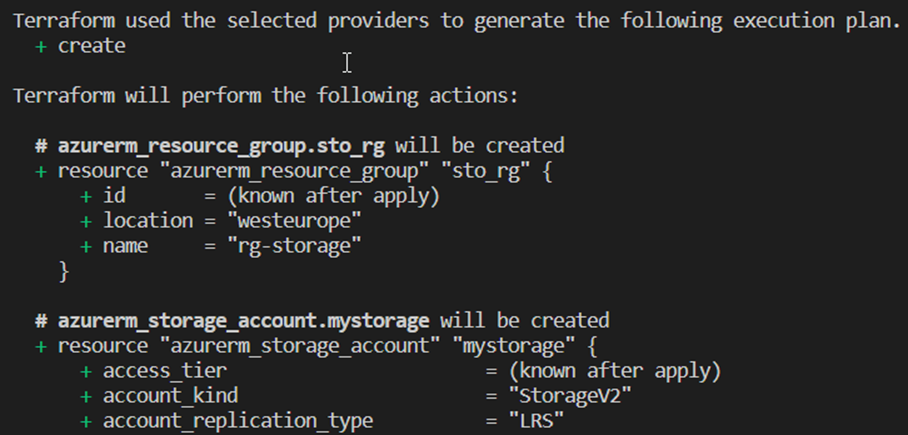
The plan step next is to update the content of the state to reflect the state of any resources that may already exist. This is then compared with the configuration according to the code and, if necessary, a set of changes is proposed to achieve the desired state. This is a good way to check whether Terraform wants to make the correct changes – what to add, what to delete, or which resources to change. With the command suffix -out=File, this plan can be saved as an executable artifact and deployed later on the basis of this. This is mainly used in automated DevOps processes to avoid surprises, otherwise it is referred to as a speculative plan, because there may have been changes to the resources between plan and apply in the meantime. This step is also carried out with every apply command.[10]
Apply
With terraform apply, the planned changes are then finally transmitted to the provider APIs – after confirmation or directly with the addition –auto-approve. If there are no conflicts with the resource attributes or authentication problems, the successful deployment is summarized and desired resource details are shown as output values. [11]

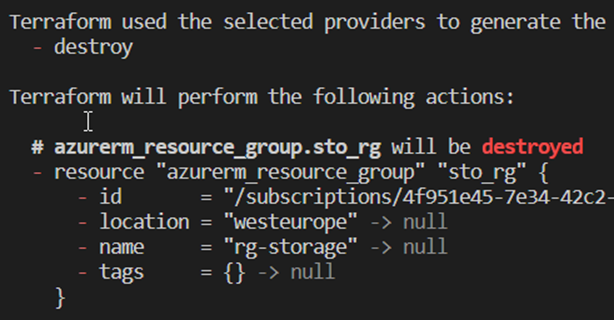
Destroy
In order to delete the described configuration from the provider later, the terraform destroy command can be used. Here, too, the content of the state is used as a mapping for the resources to be removed. If the necessary confirmation is not skipped, the details can be checked again in an overview. Destroy has the same effect as deleting all resources from the code configuration and then using an apply command.[12]
Summary
This Blog described the initial terraform setup and showed in a first simple example, how in detail the steps of a Terraform resource deployment look like with the most important commands.
In the next post, we will dynamize a Terraform configuration and convert it into a file/folder structure as it is common practice.
[1] https://stackoverflow.com/questions/1618280/where-can-i-set-path-to-make-exe-on-windows
[2] https://learn.hashicorp.com/tutorials/terraform/install-cli
[3] https://marketplace.visualstudio.com/items?itemName=HashiCorp.terraform
[4] marketplace.visualstudio.com/items?itemName=ms-azuretools.vscode-azureterraform
[5] blog.gruntwork.io/how-to-manage-terraform-state-28f5697e68fa
[6] https://developer.hashicorp.com/terraform/language/state/purpose
[7] https://developer.hashicorp.com/terraform/language/state
[8] developer.hashicorp.com/terraform/language/modules/develop/refactoring
[9] https://developer.hashicorp.com/terraform/cli/init
[10] https://developer.hashicorp.com/terraform/cli/commands/plan
[11] https://developer.hashicorp.com/terraform/cli/commands/apply
[12] https://developer.hashicorp.com/terraform/cli/commands/destroy