
This blog continues the Terraform series with the fifth part. Part 4 was about the options with conditions, repetitions and constructs. Now we are talking about provider configurations and how to deal with remote backends.
Terraform is often said to have a certain multi-cloud capability. The fact that Terraform can be used to address different clouds or SaaS products cannot be denied. Unfortunately, the dream of deploying your IaC code on all clouds without any adjustments remains just that: a dream.
When we talk about Terraform as a multi-cloud capability, we mean Terraform as a framework. For example, the way resources are declared or variables are used. For developers, it means flexibility, as there is no need to learn a new tool to manage infrastructure in AWS instead of Azure. However, each cloud has its own specifications and so an Azure Blob Storage account cannot be translated 1:1 into an AWS S3 bucket.
The concept of how the different clouds are supported will now be looked at in more detail. Terraform is logically divided into Terraform Core and Terraform Plugins. If we download the Terraform binary from the HashiCorp website, we come into possession of the core part. This is responsible for all functions that are not specific to cloud providers, such as handling dependencies. However, real infrastructure cannot yet be managed in any cloud.
This is where the providers come into play, Terraform’s only plugin type so far. Providers take care of the authentication and ultimately the communication with the target APIs of the cloud providers. In short, every resource and every data query is implemented by a provider that ultimately contains the logic for provisioning.
In the meantime, there are a number of providers that can be used. Among them: AWS, Azure, GCP, Helm or Kubernetes. A complete overview of all available providers can be found on the Hashicorp website[1].
The azurerm provider
Now let’s take a closer look at the azurerm provider. The minimum configuration is as follows:
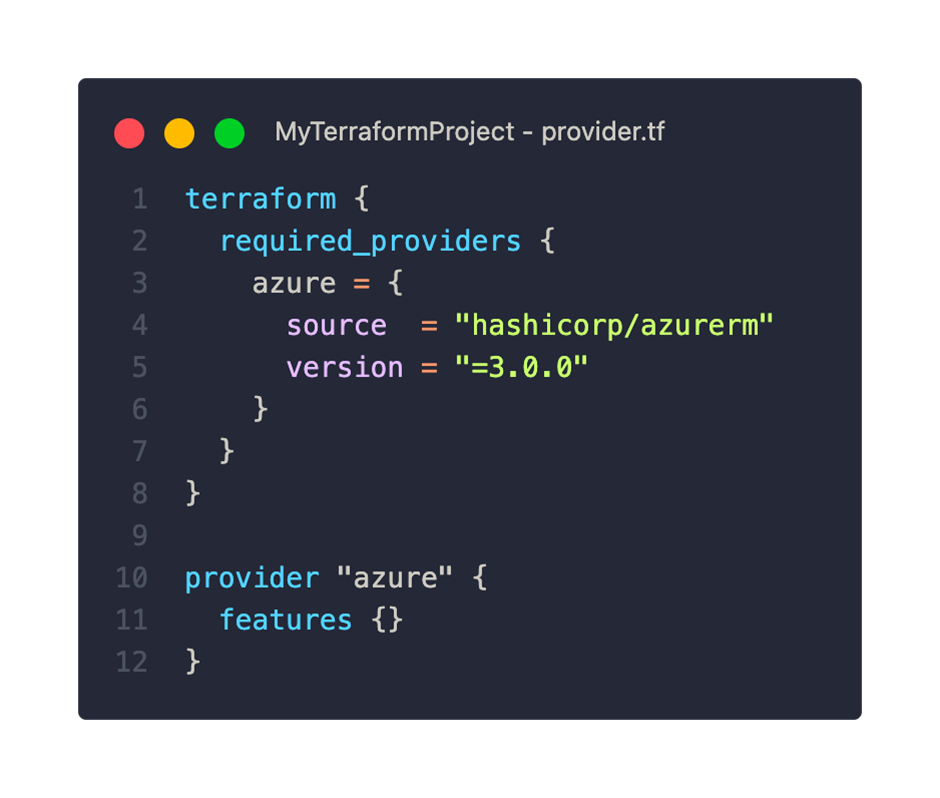
Within the required_providers block, we declare all required providers. To do this, we set a freely selectable local name (in this case ‘azure’), the source and the version. The source “hashicorp” is an abbreviation and refers to the HashiCorp public provider registry.
With the provider block from line 10 we have the possibility to configure the provider more precisely. Even if no settings are made, an empty features block is mandatory. More on the options in a moment.
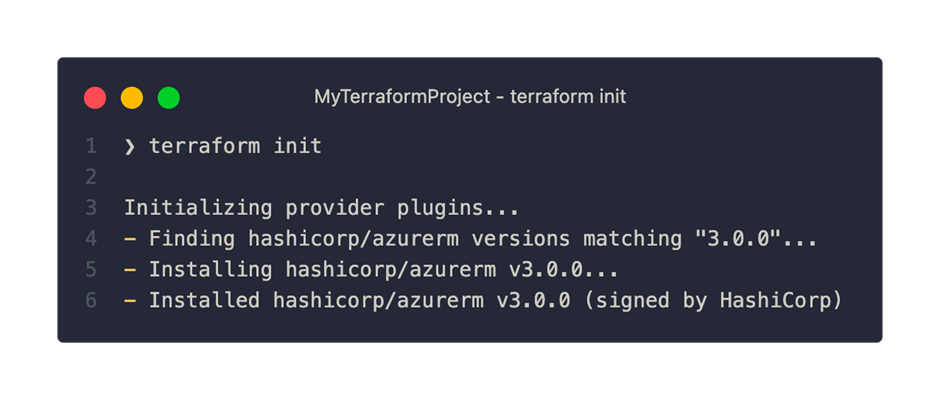
If we run the terraform init command with this provider configuration, Terraform will search our project for providers and install it:
After the successful provider initialization, we find two new objects in our Terraform project:
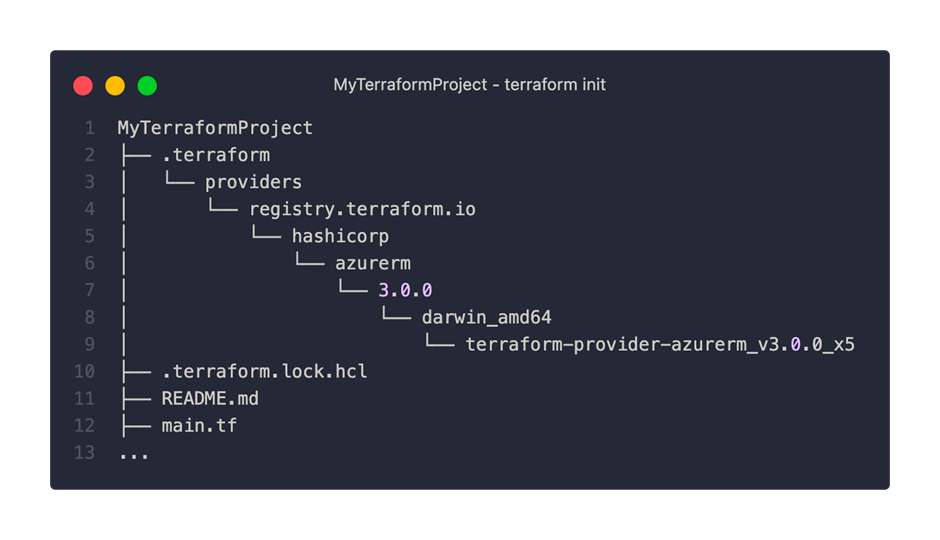
On the one hand, we can see that a directory with the name .terraform has been created and in the depths of which the azurerm provider in version 3.0.0 is located. The other new feature is the .terraform.lock.hcl file. This file ensures that the same version is used for future initializations.
TIP: This file can and should be checked into version control. It prevents unintentional updating of the provider. Even though we may accept minor version updates, this process should be controlled.
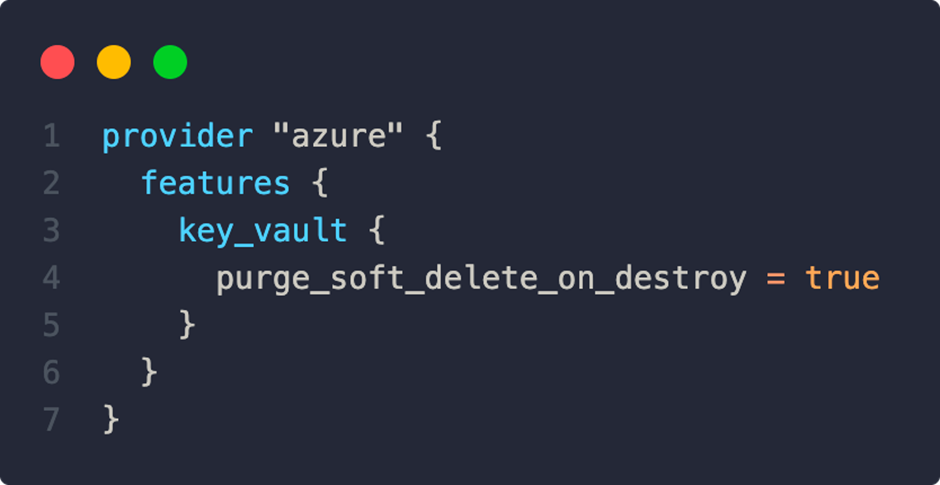
As mentioned earlier, we can use the features block to set specific behaviors of the provider. With the following configuration, for example, key vaults are deleted immediately without waiting for the soft delete duration. This frees up the Key Vault name for other uses:
All available options can be viewed here[2].
Development of own providers
If the standard providers do not provide the desired functionality, you can think about implementing your own provider. These can be hosted in private registries and thus made accessible company-wide. HashiCorp provides documentation on its website[3].
Remote Backends
Already in the beginning of this series we looked at the function and meaning of the state file. As a reminder, Terraform uses this file to track the currently deployed state, as well as any dependencies. The state file can contain sensitive data such as passwords and can cause great difficulties in case of loss or corruption. In principle, it is advisable to regularly create a backup of the Statefile and protect it from unauthorized access.
By default, the statefile is located in the local file system under the name terraform.tfstate. For smaller tests and individual developers, the local option may suffice. But as soon as you work with several people, a problem arises: Every developer has to make sure that they always have the latest version of the state file. Otherwise, inconsistencies and conflicts would be the result.
To solve this problem, Terraform offers a selection of remote backends. Remote backends use services such as Azure Blob Storage Accounts or AWS S3 buckets to store the state file. In addition, a locking mechanism is implemented by all remote backends, which at the same time prevents changes to the state file. A feature that is not available on the local backend.
Next, we’ll look at the implementation of Azure Blob Storage as a remote backend. To do this, we add the following code to our terraform block:
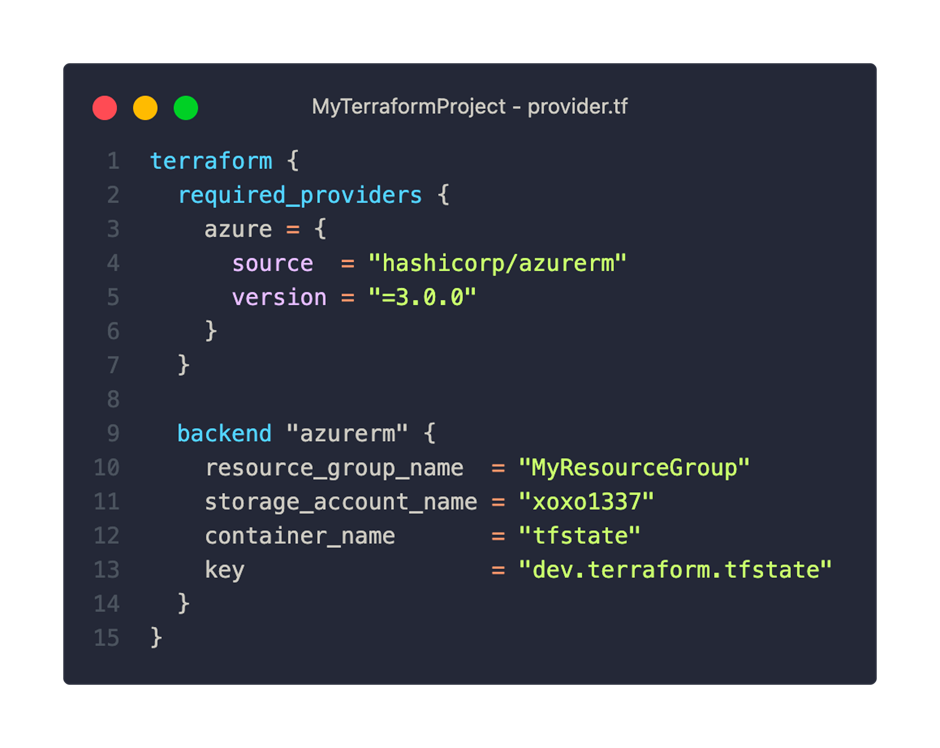
The structure is quite simple. We specify the name of the existing storage account and its resource group. Using the parameters container_name and key, we can specify in which container and under which name the state file is saved.
Before we can use our new backend, we still have to take care of the authentication. Various options are available for an Azure backend, e.g.MSI, SAS Token or Azure CLI. Every time we change the backend configuration, we need to initialize this with the terraform init command.
An overview of all available backends and their options can be found in the official documentation[4].
What came first? Statefile or Storage Account?
The use of the azurerm backend requires an existing storage account. This inevitably raises the question of how it is created. Unfortunately, it is not possible to create the storage account with the terraform apply command. We are faced with a classic chicken-and-egg problem here. Terraform cannot create a storage account for the statefile without first storing the statefile correctly in the backend.
The use of a second Terraform configuration, which is only used to create the backend storage account, does not improve the situation much. Whether we opt for a remote or local backend, both options come with significant drawbacks. For the remote backend, we would need an existing storage account again. The local backend does not allow us to share the state file with teammates. An upload of the storage account would not be possible in the future.
In practice, it has been shown that the best way to manage the storage account is outside of Terraform. A simple PowerShell or Bash script in combination with the Azure CLI, which follows the following logic, has proven to be a simple but effective solution. Before executing a Terraform command, the script creates a storage account if necessary. This can then be passed to the subsequent Terraform commands as a backend configuration via the parameter -backend-config=”KEY=VALUE”.
In this post, we took a detailed look at important central components of Terraform’s concept: the provider approach and the state file.
In the next part, we will look at the theory and handling of Terraform modules – another step towards dynamization and reusability.
[1] https://registry.terraform.io/browse/providers
[2] https://registry.terraform.io/providers/hashicorp/azurerm/latest/docs/guides/features-block
[3] https://developer.hashicorp.com/terraform/plugin
[4] https://developer.hashicorp.com/terraform/language/settings/backends/azurerm