
In the last posts of the series, we learned basic options for making Terraform code more dynamic with variables and functions. Furthermore, we took a look at the statefile and the provider definition.
Continuing the series with part six, is all about modules in the upcoming blogs. Among other things, we will go through the questions:
- What are modules?
- How are they structured?
- How do I offload the existing code into modules?
- How can modules be used in a team?
- When do they really make sense?
- What are best practices when working with modules?
So let’s start!
Basics of modules
Originally, we managed our Terraform code in a single large main.tf file. It was assumed that a single developer would use the Terraform CLI locally to provide the infrastructure. This approach is also sufficient for beginners and simple use cases.
However, as soon as multiple developers or teams start working with Terraform, questions about modularization and reusability arise. As part of the “Don’t Repeat Yourself” (DRY) principle, the reuse and encapsulation of code is an essential part of any application development.
Terraform makes it possible to split code into smaller, isolated and reusable parts, which many readers will be familiar with from object-oriented languages. Each module represents a specific function or concept and can be called by other modules or configuration files as often as desired.
The modules in Terraform allow code to be shared and reused, whether between team members or the public.
Define modules
There is no need for special keywords to define modules, as is the case with classes in object-oriented programming. To put it simply, a module is a folder. This contains files for a logically coherent deployment – for example, with resources, variables and outputs.
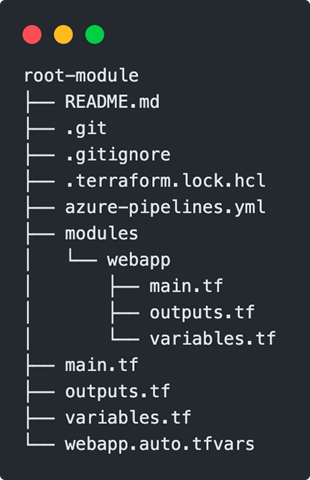
In Terraform, everything is a module, similar to how in some programming languages everything corresponds to an object. The top folder level of a Terraform project also corresponds to a module. This is called the root module and is usually the place where the terraform init, plan, and apply commands are executed. In addition to the root module, any number of nested modules can be created. There is no technical limitation to the nesting depth, but it is advisable to use it sparingly.
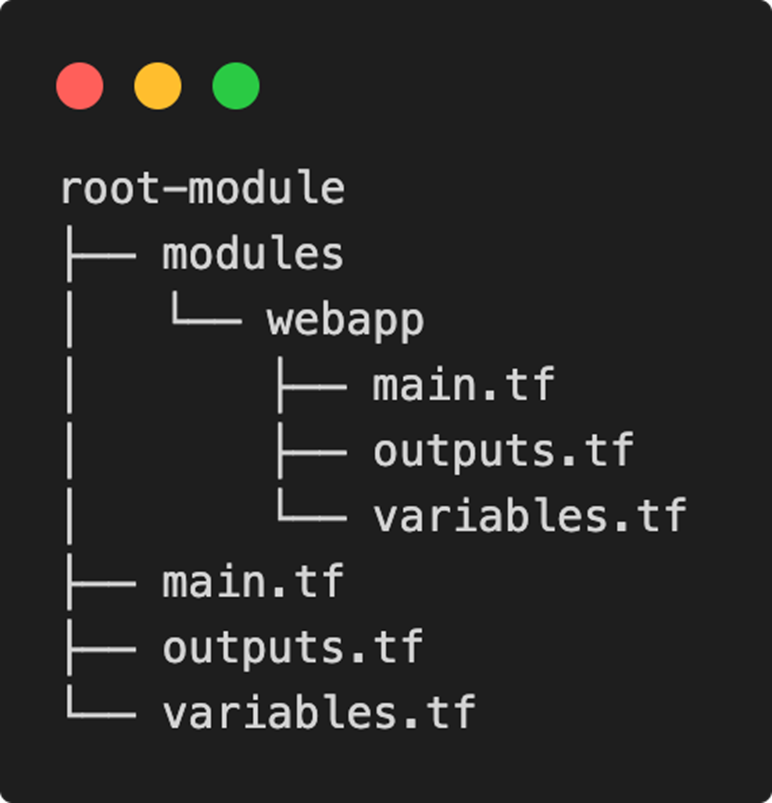
Each module, whether root or submodule, is based on the already known standard files. A Terraform repository with a nested module would therefore look like this:
Calling up modules
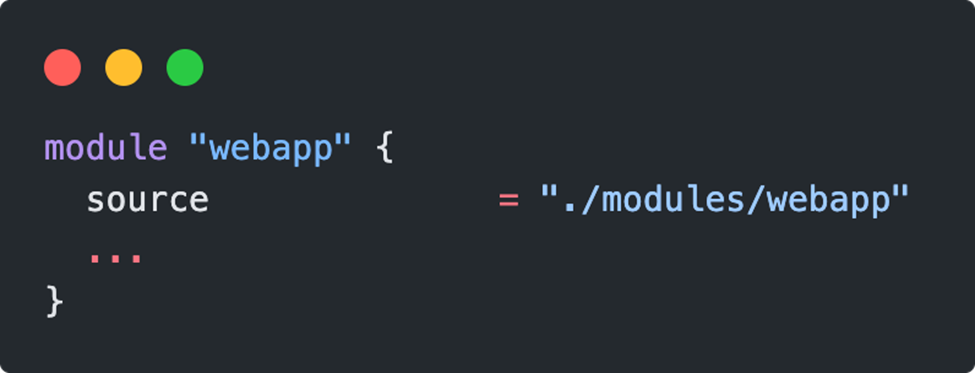
Modules can be called from anywhere in the code. This is done with a module block, which is given a name for further use in the code. Within the block, the source attribute defines where the source of the module is and which variables are passed.
From monolith to modular construction
The basic elements of the modules are now known. To illustrate, an existing Terraform repository is used below to outsource the code to a module step by step. The code can be found at[1] . There are 3 branches in total:
- master: Initial structure and initial situation
- local-module: Modularized code with local source
- remote-module: Modularized code with remote source
Starting situation
The initial situation of our Terraform code is very simple. Two resources are created: azurerm_service_plan for the hosting hardware and azurerm_linux_web_app for the web application itself. Parameters can be used to define attributes such as the name.
Let’s assume that these two resources are frequently created and linked by us. To make it easier in the future, we will outsource the code to a module and reduce it to the most common parameters. We also make it our task to establish well-defined standards in the module, such as enforcing HTTPS connections. The goal is not to deal with as many special cases as possible, but to create a user-friendly all-round module.
Create the module
In the first step, a directory for the new module is required. Within the folder, our standard files main.tf, outputs.tf and variables.tf are created. The structure should now match the screenshot and contain the three empty files.
Offload existing code
The next step is to decide which part of the code should be outsourced. At least the resources azurerm_service_plan and azurerm_linux_web_app are implemented in the module – so that not every developer has to establish a function for unique name generation, the random_integer resource is also moved to the module. The resource group is not created in the module, but is left to the user of the module. The scope of resources required for the module is now determined:

The entire three code blocks can be moved to the main.tf file in the modules/webapp folder.
The previously referenced resources and variables lose their validity. To use variables in the module, they must be defined in the modules/webapp/variables.tf file . Syntactically, it remains the usual format. Which variables our module offers is up to the respective creator. As a conscientious colleague, the thought might come up to offer a variable to disable HTTPS. It is certainly easier to carry out such small tests.
As already mentioned, we want to establish certain standards in our module and therefore decide against it. This means that the setting is permanently built into the module code and there is no way around it for consumers of the module.
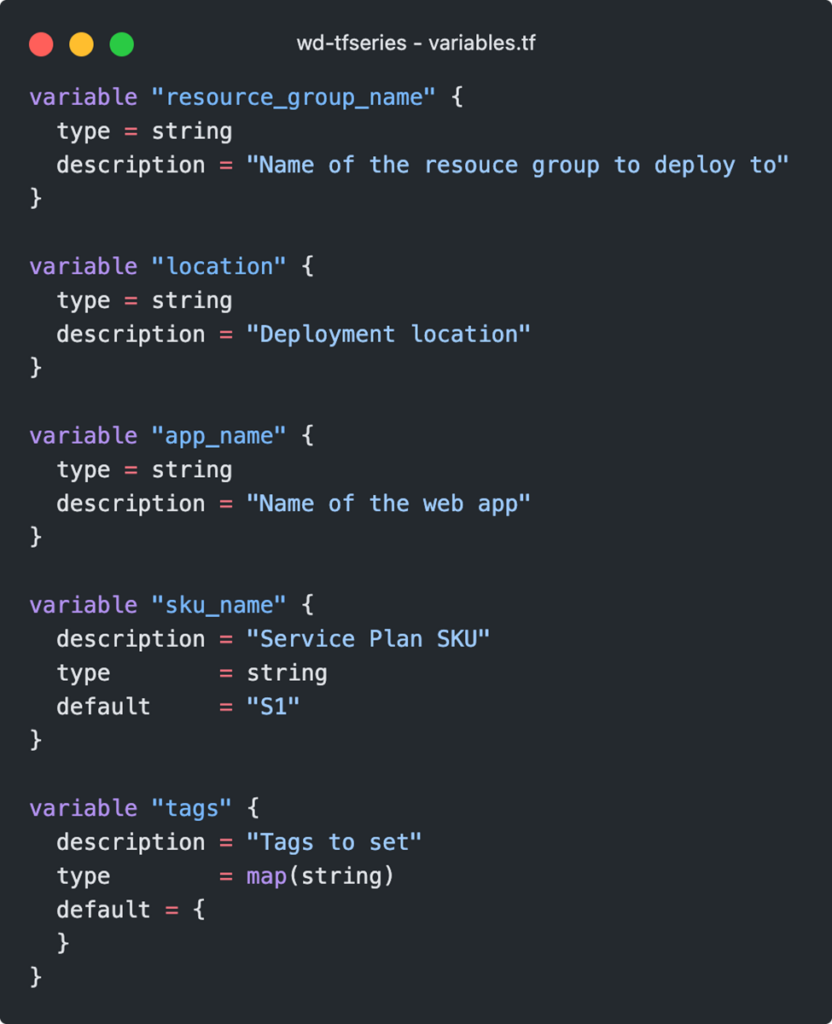
It is no longer possible to reference the resource group via azurerm_resource_group.web from the monolith approach. In the future, the resource group must be specified by the module that uses it. A variable is defined for the exchange of this data, which can be addressed in the module using the keyword var.resource_group_name. The definition of the module is thus complete.

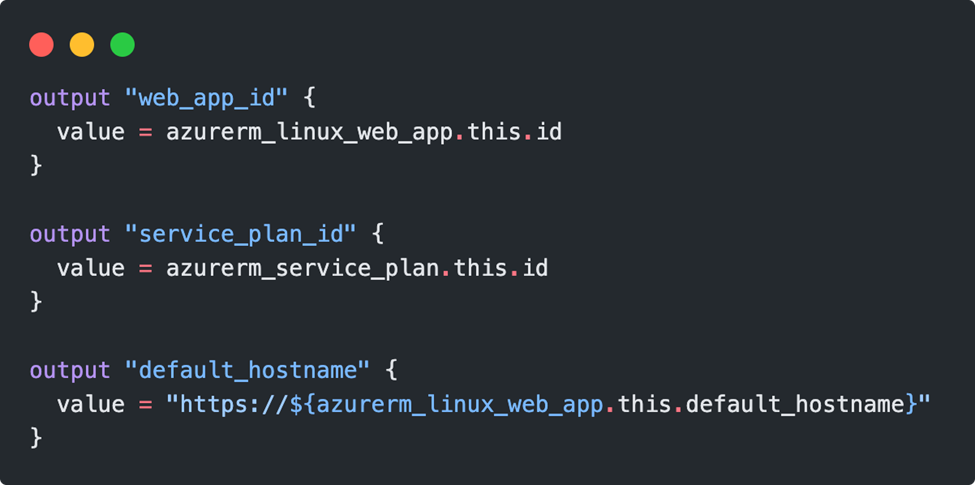
Optionally, output values can be defined. The calling module can query these values and process them further. The syntax corresponds to the already known output syntax.
Using the module
There are two ways to use a module. Referencing is done either via the local storage location in the file system or by specifying a remote repository. We will stay here in the first variant for the time being.
A local module means that the value of the source variable points to the same folder directory (as seen from the root module). For example, if the module “webapp” to be called is located in a parallel folder, the call would be according to the syntax:

per “.. /” can be navigated up in the folder levels. However, Visual Studio Code also has a pleasant support here with extensions and can suggest the paths.
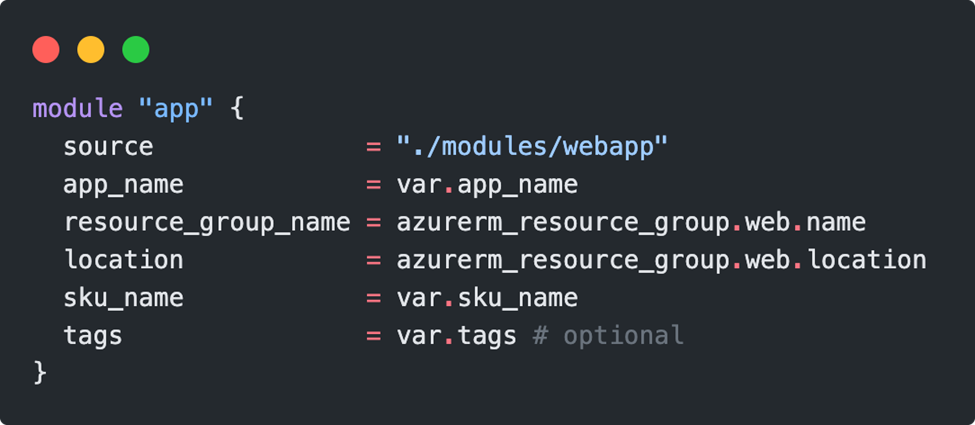
In addition to the source of the module, all parameters that do not have a default value must be passed. The finished call of the module looks like this:
Initializing Modules
Before the terraform plan & apply commands can be executed, the app module must be installed, all you need is a terraform init. Terraform copies all required modules from the specified source to the .terraform directory. After successful initialization, the code can be deployed.
In the next blog we will check how to deal with remote modules.